Open topic with navigation
MAPS Installation and Migration
- Log in to the server that will become your first MAPS node. This should be a new server with no preexisting MAPS installation. You can log in to the server directly or via a tool such as Remote Desktop. You must log in as a user who has administrative privileges in order to perform the installation.
- Download the MAPS software from the Evisions website and save it in a location where you can access it.
- Right-click on the installation file that you downloaded and select Run as administrator. Note: The installation will fail later on if you do not run it as an administrator.
- If your system does not already have the required version of the Microsoft's Visual C++ redistributable package, you will need to install it before you can continue. Accept the Microsoft Software License Terms and select Install to continue.
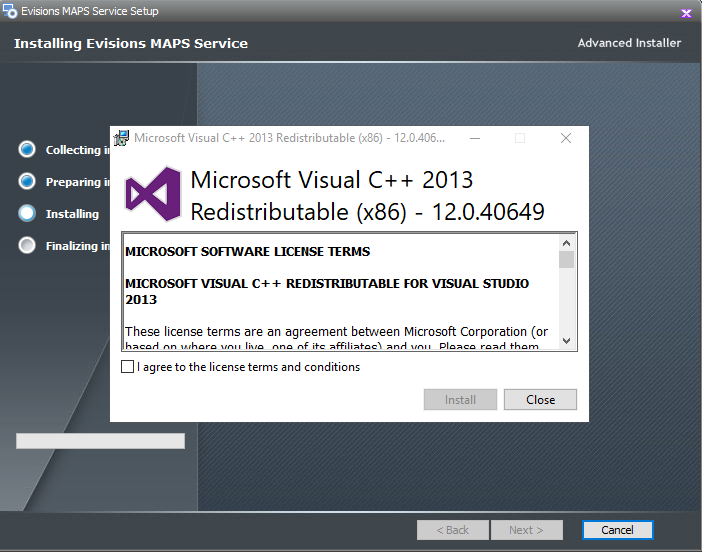
Redistributable Requirements for MAPS Installations
The version of the Microsoft Visual C++ Redistributable you need depends on your MAPS installation.
64‑bit clustered/Postgres installations: If MAPS is running in a clustered setup or uses 64‑bit Postgres, you’ll need to install the Visual C++ 2015 (or later) redistributable package.
64‑bit Postgres XQP: Using the 64‑bit Postgres XQP also requires the Visual C++ 2015 (or later) redistributable package.
32‑bit installations: These installations require the 2013 or higher redistributable package.
- Specify the installation folder (the default is suggested) and select Next.
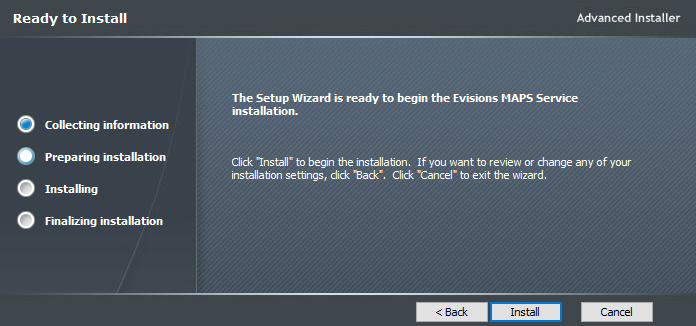
- When you get to the final screen, select Install to proceed.
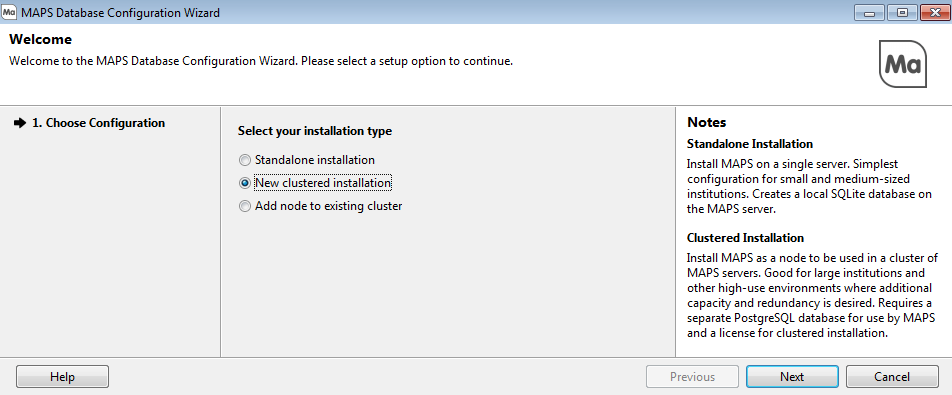
- The MAPS Database Configuration Wizard will be launched automatically as part of the installation process. When asked to choose your installation type, select New clustered installation.
- Enter the address of the PostgreSQL server that you configured in the previous step, along with the database name and the database administrator credentials. If you configured PostgreSQL to use a non-default port, you can also change that here. For information on SSL Mode, see Data Connections.
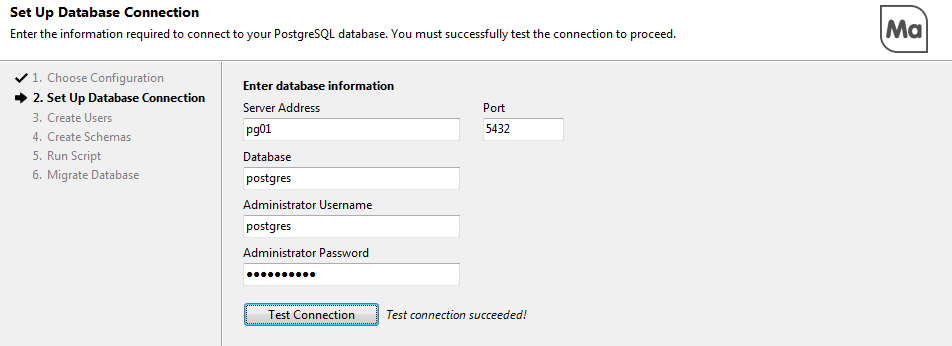
After entering the database information, select Test Connection. If everything was correct, a "Test connection succeeded!" message will then be shown next to the Test Connection button. The test must be successful in order to proceed to the next step.
- On the Create Users screen, you are creating the database users who will own the schemas and tables for the MAPS, MAPS auditing, and Argos databases. You can use the same user for all three databases, or create separate users.

Note: Some cloud environments such as Microsoft Azure may require you to use a fully qualified username, for example maps_admin@servername.
- On the Create Schemas screen, confirm or modify the names for the MAPS, MAPS Auditing, and Argos schemas, then select Next.

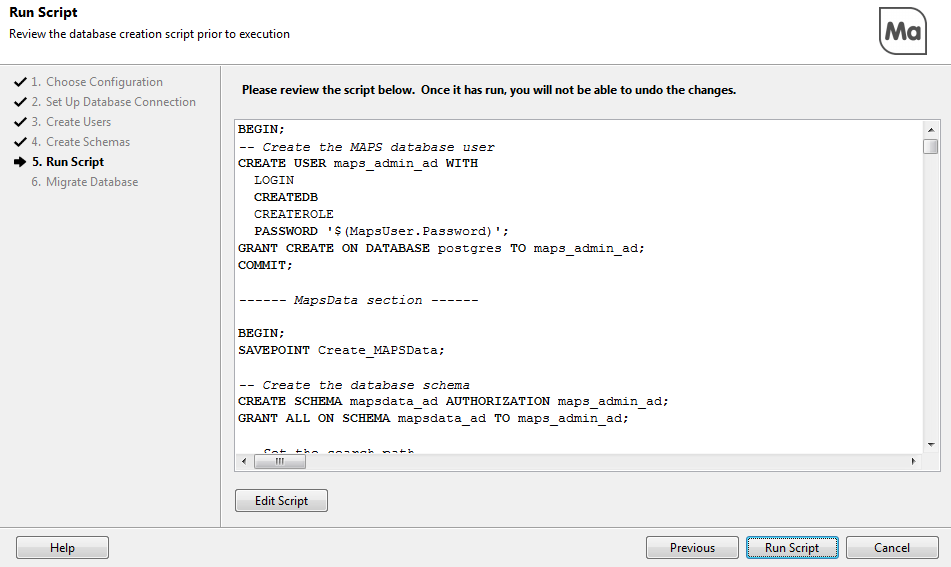
- The Run Script screen shows a preview of the database creation script that is about to run. If changes are needed, you can choose to edit the script. When you have reviewed the script, select the Run Script button.
- On the Migrate Database screen, you have the option to migrate the SQLite databases from an existing standalone MAPS installation (version 6.1 or higher ONLY) into the new clustered environment so that all your data, users, and configuration settings will be brought over into the clustered environment. If you choose to migrate, enter the location of the MAPS Service directory from the old server. This can be done using a local copy of the directory obtained ahead of time, or you can enter the UNC path to the directory on the original server if you have access to it from your current location. The files in this directory will not be modified in any way, only imported into the new environment.
Note that if you plan to migrate existing databases, you must do it before you begin using MAPS or Argos in the clustered environment. You can do the migration now, or do it later by running the MapsDbConfig (32-bit) utility in the MAPS Service directory. This application gives you several options for modifying the installation or migrating databases after the initial setup. A shortcut to this application is created on the desktop as part of the installation process.
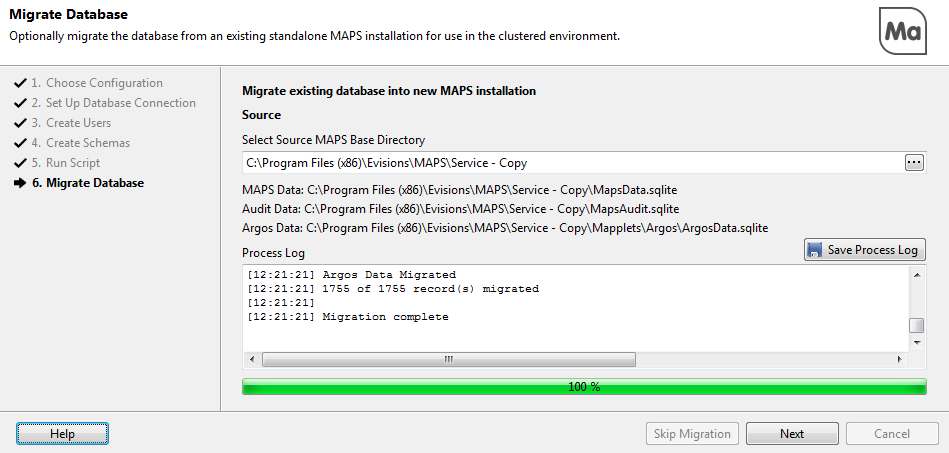
After selecting the directory to migrate from, select Start Migration. The Process Log area will update as the migration proceeds, and a progress indicator will be shown at the bottom of the screen. When the migration finishes, you should review the log for any errors. If necessary, use the Save Process Log button to save the log to a file. If you ran into any problems with the migration, this log file can assist Evisions Support with troubleshooting.
When finished with the migration, select Next; or, if you choose not to migrate a previous environment, select Skip Migration.
Note: If your previous MAPS installation used the Cloud Connector, you will need to refresh the data for each connector (or wait for it to be refreshed according to its configured refresh interval) before the connection will be usable in the clustered environment.
- The database configuration and MAPS installation is now complete. Select Finish and Close Wizard to return to the setup program, then select Finish.


